PowerSchool Teacher Pro

Quick Steps
- If you get locked out of PowerSchool, it usually will unlock in about 5 minutes. Email Drew Jackson if it does not unlock and he can unlock for you.
- Below are different topics. Click the drop-down for information.
- Determine if:
- Total Points
- Weighted / Category Points
- If Weighted / Category Points
- You need to create the categories first.
- Select Grading charm/icon and select Categories
If you need help with your Power Teacher Pro gradebook, please contact Drew Jackson.
Below are different topics including How To instructions. Click the drop-down for information.
-
- Open PowerTeacher Pro
- Select Settings / Traditional Grade Calculations
- Click the Pencil to review, edit, and SAVE
- TOTAL POINTS
- Make sure the category you set up is showing in Total Points.

-
- Open PowerTeacher Pro
- Create Categories First
- Select GRADING charm on the left.
- Select Categories
- Click the PLUS BUTTON upper right corner and select Category.
- NAME the category first
- Select the Class(s) next
- Select a color if you would like and SAVE
- Repeat for additional Categories.

- Select Settings / Traditional Grade Calculations
- Click the Pencil to review, edit, and SAVE
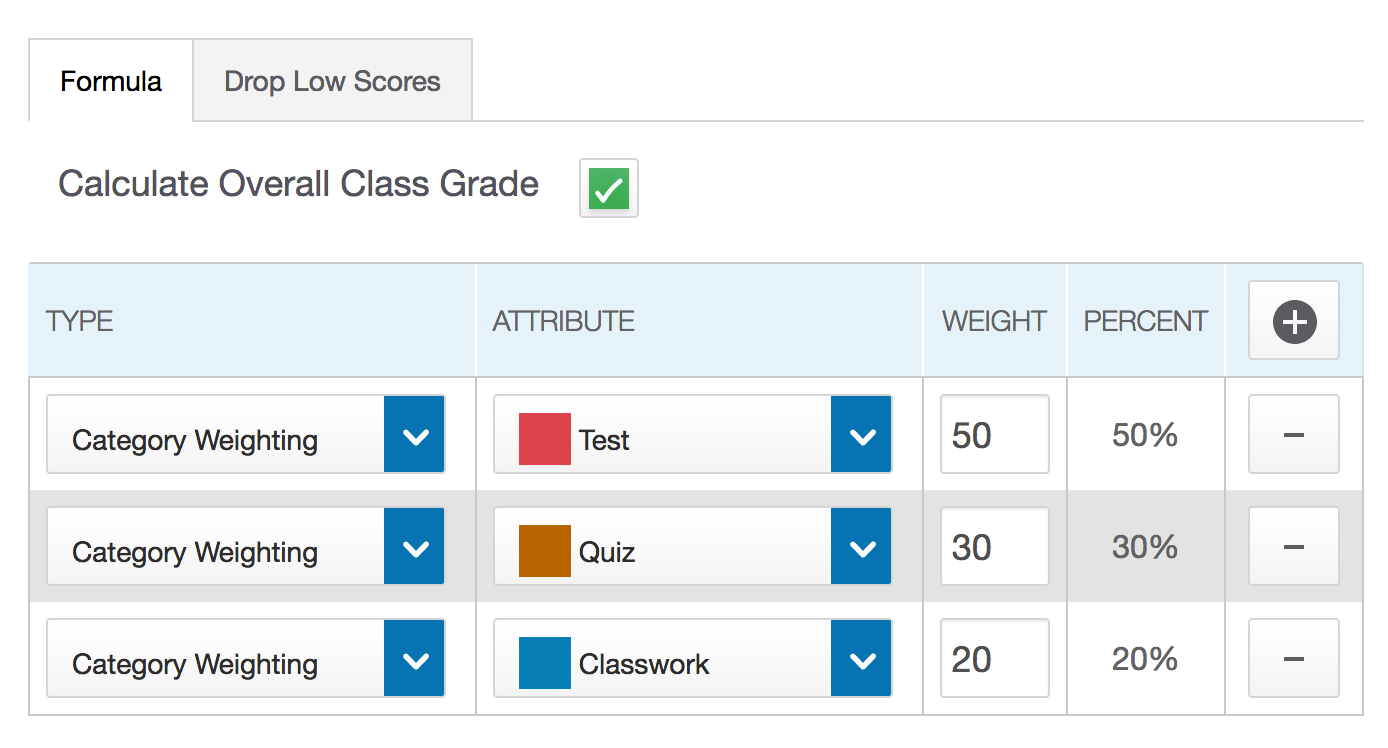
- CATEGORY WEIGHTED
- Make sure EACH category you plan to use is showing.
- Make sure the percentages are correct for your courses.
- SAVE for each course.
- NOTE: SAVE may not show on Chromebook all of the time.
Example of Total Points Screen
Example of Category Weighted Screen

-
-
Semester Exam (X1 or X2)
Reminder that PowerSchool already has a page ready for you to simply type in your exams grades or enter exempt. You do not add a column in assignments, you already have a Scoresheet for this.
- Select Grading / Score sheet.
- Check the upper right-hand corner drop down to make sure you are in X1 or X2 as needed.
- Click in the column to activate grade entry.
- Enter the exam grade for each student in the percentage block.
- If a student is exempt from the exam:
- Select the exempt button or....
- Select the Code button and select the X.
- You may use the Fill down button if needed. (button with arrows pointing up and down)
- X1 or X2 will be used in the calculation for F1 and F2 (semester grade)
-
- F1 - Final Semester One Grade
- F2 - Final Semester Two Grade
The district has already set F1 and F2 calculations as follows:
- F1 calculations:
- Q1 = 40% Q2 = 40% X1 = 20%
- If exempt is marked for X1 then Q1 = 50% and Q2 = 50%. Entering exempt is included in the Semester Exam section instructions.
- F1 will be pulled from teacher gradebooks and Stored in F1 on the student report card and the historical file.
- F2 calculations:
- Q3 = 40% Q4 = 40% X2 = 20%
- If exempt is marked for X2 then Q3 = 50% and Q4 = 50%. Entering exempt is included in the Semester Exam section instructions.
- F2 will be pulled from teacher gradebooks and Stored in F2 on the student report card and the historical file.
-
- Open a Class
- Select Reports / Scoresheet Report
- Image 1 Criteria Tab, make your selections
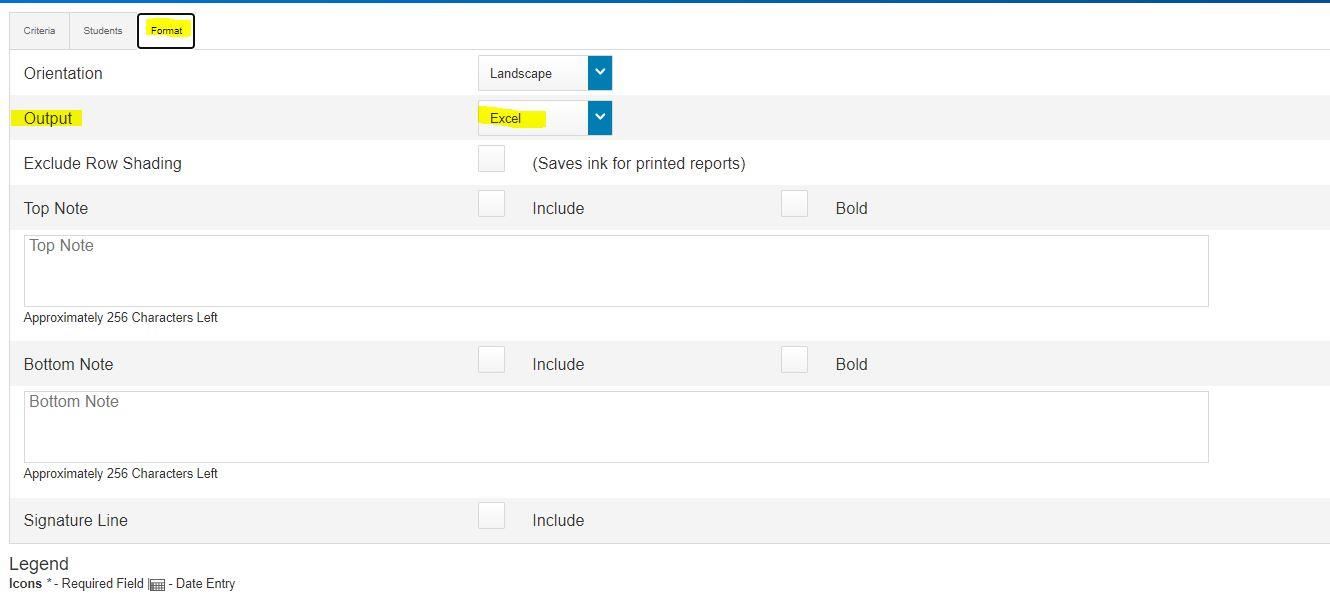
- Image 2 Format Tab, select Output - Excel
- Run Report
- View Report
- It will open in Excel
Image 1

Image 2

-
How to View All Grading Period Grades at One Time (Q1, Q2, X1, and F1 or Q3, Q4, X2, F2)
- Click the Grading icon and select All Reporting Terms
- Or you may print a report:
- Reports / Scoresheet
- Scroll to Final Grades-Select Terms. Click and check Q1, Q2, X1, and F1 or Q3, Q4, X2, F2.
- Run Report.
- View Report when finished.
- We suggest you save a copy to your files.
- Open the Report
- Print or Save as PDF for your Files.
-
How to Find a Student Who transferred from your class
If a student changed out of one of your course sections, you may locate their grades:
- Open the course in PowerTeacher Pro Grading
- Click the Students icon on the left
- Click Show Dropped
- You will see a list of students who changed from your course.
- Click the student's name to see the grades.
-
Print a Hard-Copy of Your Gradebook each quarter
- Reports / Scoresheet
- Select your terms
- Run Report / View Report
- Open Report and Save or print as PDF to your files
-
On November 2, 2022 MBS added a new email plug-in to our PowerTeacher Pro. This new plug-in provides
teachers access to people who are to receive mailings.- Access PowerTeacher Pro
- With the Current Classes screen open, teachers have a mail icon.
- Click the mail icon and a screen will open with the student, student email, and guardian/parent
- emails.
- Once you make your selection, they appear at the bottom of the window.
- Click Copy and paste to your Outlook. If sending a group copy to BC (blind copy).
- This email will be sent from Outlook and teachers will have a copy in your SENT folder.

